Friday, October 2, 2015

Tailoring & Alterations 101--

There are so many things a tailor can do that would surprise you.  From customers I often get the response, "you can do that??" --It makes me smile every time.  When I acquire a new customer, they are either skeptical of what can be done or not done because they've gotten their work done poorly somewhere else.  So I thought I'd let you guys in on a little secret--EVERYTHING can be altered.  It's usually a matter of skill, and opportunity cost.  A great tailor knows when something will cost them more time then it's worth investing in.  And they should tell you that up front.  Some things are just not worth the time needed to put into them.  Especially if they are an outdated style, or poor quality garment to begin with.  When I look at a garment I evaluate right away whether or not it is worth my customers money investing in it.  If it is a major cost, will that style also carry over to the next season?  How much wear will they really get out of it?   All of these things I think about and evaluate when I meet and fit my customers.  And they should also be things YOU think about before you get your clothes altered.  

Here are a few things you wouldn't have guessed your tailor could do.

1.  Shortening a sleeve from the shoulder.

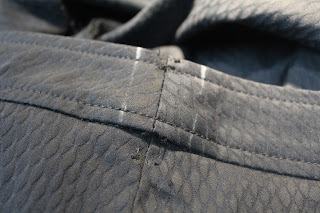
If you've ever had a jacket that has an unusual or detailed sleeve cuff you probably thought it couldn't be shortened.  If the detail is too much for me to remove and re-apply, I can simply shorten the sleeve from the shoulder.  I have had several women's wear jackets that had intense beading at the cuff, like this--
 IF that is the case I would shorten from the shoulder.  Also, for men's wear, it has become trendy to have working button holes in the sleeve vent.  (That means the button holes are cut)  If this is the case and you really like that detail, I would shorten from the shoulder.

Keep that in mind when you are looking and shopping from Fall.  Also, many tailors do not do this, so if you don't live in the Cincinnati area, make sure you ask your tailor if they can do this before purchasing a jacket with this issue.

2. Vintage Garments

Say you see a vintage garment that you love but has a few rips here and there.  I have often fixed vintage garments by replacing panels here and there where there was either a moth hole or tear that couldn't be repaired.  This of course is easier when the garment is a solid color and fabric can be easily matched.  Plaid's for example get tricky.  If you see a vintage garment you just love, ask your tailor if things can be fixed on it, it may just become a staple piece in your closet!  If the garment is too damaged, it can ALWAYS be used as a pattern and recreated to make you a brand new version of your vintage garment!


3. Denim

The number one question I get asked is if denim can be altered.  Of course it can!  There is nothing that can't be done with your old, new or vintage denim.  If you want and original hem, say for a  distressed bottom, it can simply be removed and sew back into its correct length.   The waist can also be altered, and should be taken in through the CB seam.  If you've had your waist altered and the tailor or seamstress puts darts in in, you know it doesn't look that great.  If you are getting the waist altered, ask them to go through the CB seam.  If you want to completely change the look of your denim but altering the leg shape all together, that can also be done.   Just ask!

4.  Dresses with low backs and the bra drama!

I've seen more low back dresses in the past year than I ever have before.  Its definitely a style that I don't see going out for a while and will carry over for several more years.  So whats a girl to do when she can't wear a bra half the time?   For ladies with a smaller chest, going without a bra is no big deal and doesn't really cause many issues.  For ladies that have a larger bust, this style is basically a no no.  Depending on the dress, there are a few things that can be done.  The most easy and basic way to achieve this look is by adding bra cups to the dress.   Now these will not give you much in the way of support, but they will definitely help the look of the garment, and you won't have to worry about seeing to much of anything that shouldn't been seen!  eek.   This is a great alteration for anyone with a B-C size bust.   However, bra cups won't always work in every garment and my best suggestion for wearing these styles is to purchase an adhesive bra.  There are tons of different brands out there that sell these, but my favorite are VS.  They run about 65 dollars and will last you hundreds of wears before you replace them.   They take a little bit of getting used to, and you will have to mess around with them a bit to figure out exactly how to work them but believe me the purchase is worth it!  They give a slight lift and support, and feel like you aren't wearing anything at all.  

5. Zippers

A zipper can be added to pretty much anything.  If you are having trouble getting in and out of a garment, ask your tailor to add a zipper to it.  This of course takes a little extra fabric in the seams, so ask your tailor what can be done.  Zipper replacement is something all tailors should do, but sometimes you can also just change the head or pull of a zipper as a cheaper fix.  Often times the zipper head gets warped from the pulling up and down but the teeth of the zipper tail remain in tack.  Do you have a pair of pants that need shortened but they have zippers at the hem?  Don't fear, the zippers can either be shortened, or moved up!  They aren't as scary as you'd think!


If you have any questions on tailoring & styling or are interested in getting things altered, please contact me via email: Krieger.jill@gmail.com, or visit my website for details on my prices and location.   www.jillianclaricetailoring.com

Tuesday, September 22, 2015

Shorten your skirt from the waist--Tutorial

In this tutorial I will show you how to alter a skirt from the waistband.  A lot of times with a printed skirt, it is difficult to alter because you don't want to lose the detail from the hem.  In this case I really liked the dark boarder at the bottom of the skirt, and didn't want to lose that integrity by hemming it.  The only option is to shorten from the waistband.  This is a moderate to advanced sewing alteration. I will show you how to shorten and reset the waistband, and invisible zipper.  
Here is the before and after.

First you need to decide your desired skirt length.  This photo above left is
the skirt before alterations.  I am about 5'9'' and this skirt was still hitting at the middle of my knee.  I wear my skirts above the knee, midi, and maxi.  I never wear them at the middle of my knee...Not a flattering look for me.  My desired skirt length is 18" down from my natural waist. (a few inches above my knee)
;l
First I measure the skirt length. It was 23 1/4" (including the WB)

Sunday, September 20, 2015

Taking in the waist--Women's Doncaster Pant


When taking in the waist on a women's pant you need to mark accordingly.  With this client, she really only needed to nip in the waist about an inch.   I use an "X" to mark where she fills out the seat of the pant, knowing I should not extend my line down any further than that point.

I thought this pant would be a good example for a waist alteration for women's wear, because it has a typical double top stitch on the waistband.  Also has some difficulty, where you need to "stitch in the ditch" and a belt loop with no visible top stitch.   I will show you how to do all of these things and make the garment look like you never touched it!

First take a look at the inside of the waistband on the inside and outside.   Notice how it looks, what the stitch length is, and other additional details like how the belt loops are sewn on and also the tag on the inside of the waist band.  
First, carefully remove the tag and we will add it back at the very end.  

Next, carefully remove the belt loop, being sure not to rip it in any way! Rip threads not fabric!

Now its time to take apart the waistband.  Open the top and where the waist band connects to the CB of the pant.  Open up an additional 3/4" outside the markings to give yourself something to work with when you are turning it inside out.  
It should look like this.
First you need to take in the seat, gradually tapering up to the waist.  The horizontal chalk mark represents where my "X" was o the outside of the garment. Your line when doing this should be as straight as possible, starting in the original stitch line a few inches south of your "X", and then tapering up into your designated measurement at the waist.  Mine was 1/2" on the double, being 1" total.

Sew that.  Remove the old stitch line. 

Then trim your seam allowance.   A lot of beginners tend to not trim the proper seam allowance, because they are afraid of making a mistake and want to leave extra fabric to be there later on.  Measure twice cut once.  That's a good motto.  If you don't trim your seam allowance to match the original your work will not look very professional.  The only exception to this rule I use is if my client tends to go up and down in weight.  If you know this personal well and they tend to need a pant taken in then let out a few months later....leave that extra fabric in there.

Serge your seam allowance in the same color thread that was originally used.   This will make your work look very professional.  If the pant had a bias tape on the seam allowance, put that back.  

  Press the seam allowance open and flat.

Time to take in the waist.  Make your markings to match at the CB seam. 

From the inside of the pant, completely separate the inside waistband piece.  This will make everything a lot easier, trust me.   
Take in the outside WB piece on your markings.  
Remove the old stitch line, and trim your seam allowance.
Press the seam allowance flat and open.
View the WB from the outside of the pant.  The CB seam of the pant and the CB seam of the WB should match! If they don't correct that.  

Now match up the CB of the WB and CB of the pant and sew in the old stitch line.  I do not normally pin this, but wanted to show you that both of those pieces seam allowance's need to match, don't let one go to the left or right, or there will be unwanted bulk in the WB.
Sew exactly in the stitch line.  Be careful not to sew in the top stitching line, because that is very close to the stitch line and can often be confusing.  
The waist should look like this, and have no top stitching yet.
Press the seam allowance "up" into the waistband section.  It should follow whichever direction it originally went.  I've seen some cases where it was pressed down.  Just pay attention to how the garment was originally sewn and follow that.

Now sew the inside WB piece. I like to match the CB to the free piece, make my mark and do the same again the the other side.
Turn the WB inside out.  Match your right and left marks right sides together, make your mark.
Sew that and cut your new seam allowance.
Press the seam allowance open and flat.
The top of WB now looks like this. The CB seam lines should match and its time to connect them.
Start by removing the top stitching back another inch or so.  This will ensure you are able to sew in the seam line properly, and not get caught up in the top stitching.  

The top stitching removed back a bit.
Sew the WB inner and outer piece together in the same stitch line.

It should look like this.
I like to stitch the top row of top stitching before I stitch in the ditch.  This is a preference thing, the order of operations is up to you.  Make sure your stitch length is identical to the one the manufacturer used.  I will use a piece of scrap fabric and test my length before I sew to ensure it is the same.  
Your top stitching should follow the exact line it was in before.  When a sewer goes over or under that line it is noticeable even after pressing, so make sure you are exactly in your line. Otherwise the garment will look like it was altered before.

Now stitch in the ditch.  For anyone who doesn't know what that means it simply means sew as close to the seam where the WB connects to the pant.  I used the head of my seam ripper to try to show you exactly where this is.  Your stitch line should be practically invisible. 

Now sew your top stitching line at the bottom of the WB. Also Sew the belt loop as marked in white chalk where it was originally.

It should look like this.  I didn't photograph how I sewed the top of the belt loop.  Each one is different, so look at how they sewed it and do the same.  
The WB should look like this.  

Finish by sewing the tag back in the same way they did.  
And you are done my friends!   

This is a very common alteration, and each pair of pants can vary.  Just remember to keep in mind what the garment originally looked like and do your best to make it look that way again!

Happy Sewing dolls!
xoxo